Due to Coronavirus and COVID19, many folks now find themselves away from the office and into their bedrooms and living rooms. If you work multiple screens for your job, then you’re definitely missing the large monitor setups you had. Thankfully, there’s a useful hidden feature in Windows 10 that you can use to fix this easily. Here is a quick guide on how to use a laptop or tablet as a second monitor! (Best of all : It’s Completely Wireless!)
What do you need for this to work?
First, you will need to have 3 things :
– A Primary Windows 10 Computer (this can be a desktop or laptop)
– A Secondary Windows 10 Laptop or Tablet (maybe a spare or old unused)
– Both devices need to be connected to your home network (Wifi or Wired)
You can right click on the Windows Icon on the bottom left, click System and scroll down to confirm your using Windows 10 on each device.

It’s a good idea to confirm both devices are on the same network. Click the Network Icon on the bottom right near the clock. As shown below, my Laptop on the left is connected to my Home router via an Ethernet Cable, and my Tablet is connected to the same Network via the Wifi connection.
Note : Both devices can just be on Wifi and this will still work.

Ethernet Wifi


Once you have confirmed those prerequisites, lets move on to Step 1 below.
Steps 1 : Configure the Secondary Laptop/Tablet
On the device that you want to use as a second screen, press Windows Key + P (Windows Key is in the bottom left of your keyboard near the CTRL ALT and Spacebar left hands side and has the Windows Logo).
You should now see a taskbar pop into view from the right hand side, click Projecting to this PC (shown in red)
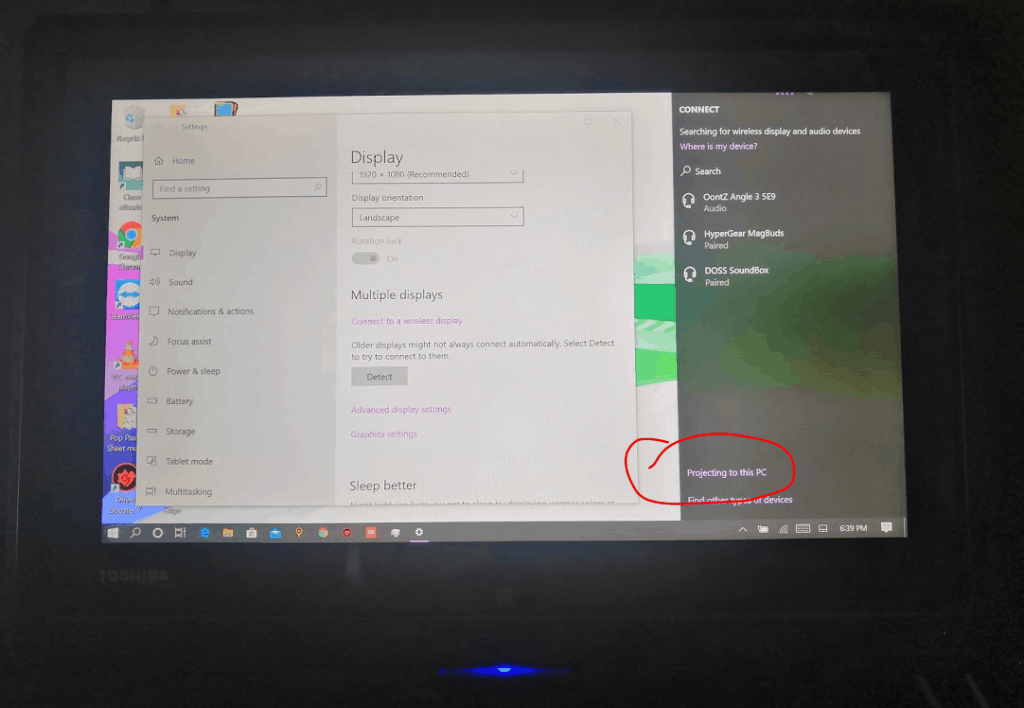
Now a window will Pop up, you will want to match the settings below (dashes in red) and also make a note of the Name of that device (red circle) :

Step 2 : Connect to the Second Screen from the Main Computer
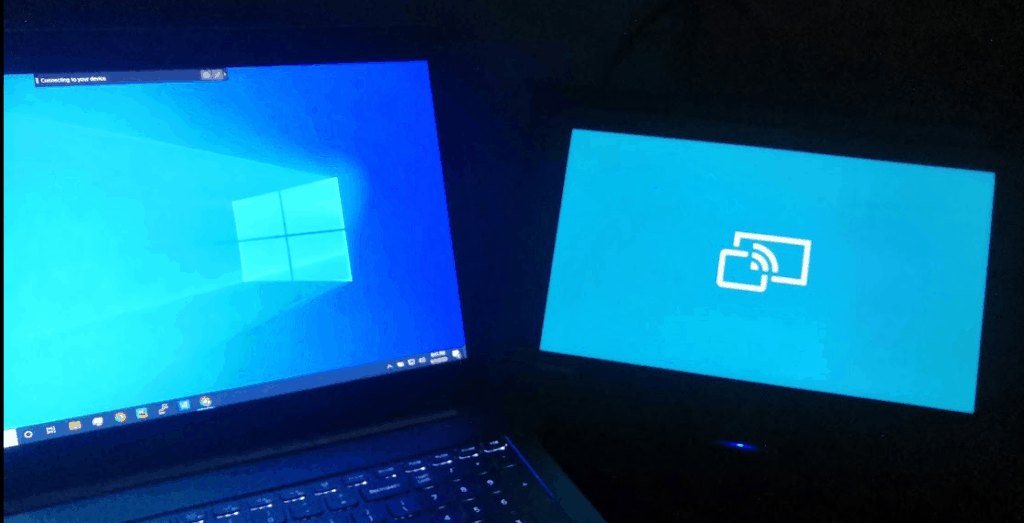
Now go back to your Main Computer (labeled #1), press Windows + P (shown in blue), and a similar taskbar pops out on the right hand side here. You have a four screen extension options (red dashes), we will click Extend then Connect to a Wireless Display at the bottom (shown in red smaller circle)

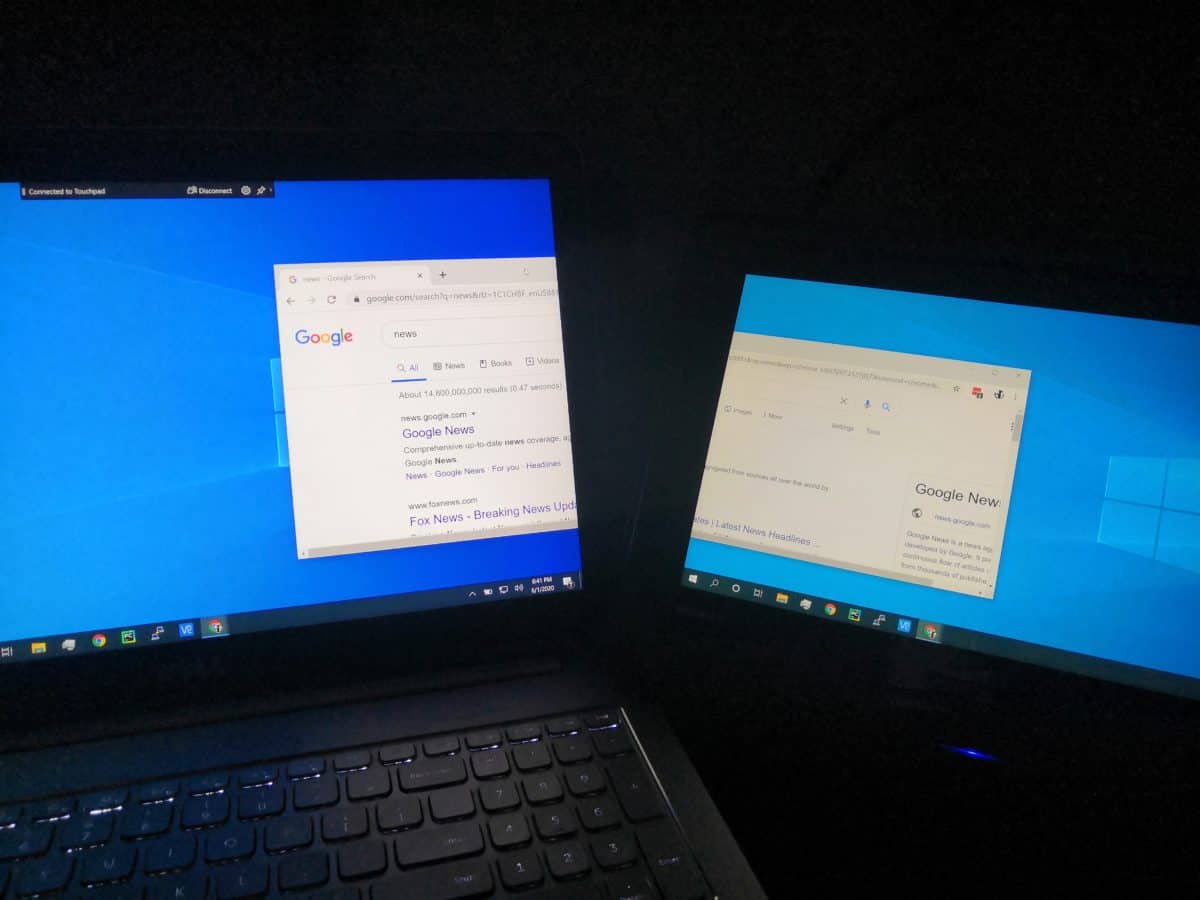
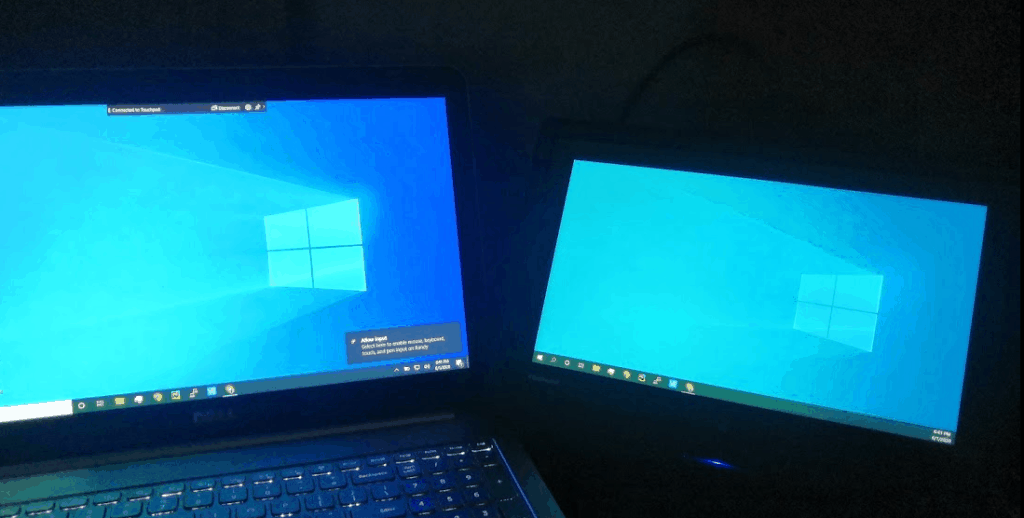
Now you will see a list of devices pop up, select the name of the device which we noted before. This will initiate your primary computer (1) to connect and share its display with the second computer (2). Now your desktop is shared between both computers! See below for what this should look like :

When the desktop backgrounds and toolbars match, your finished 🙂
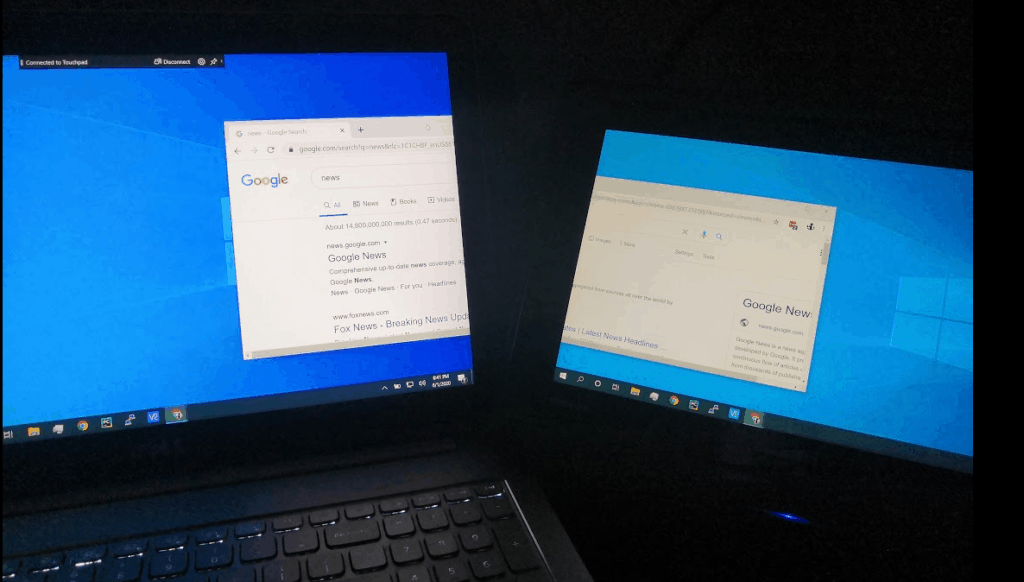
Now you can have applications shared between two monitors to help you multitask!
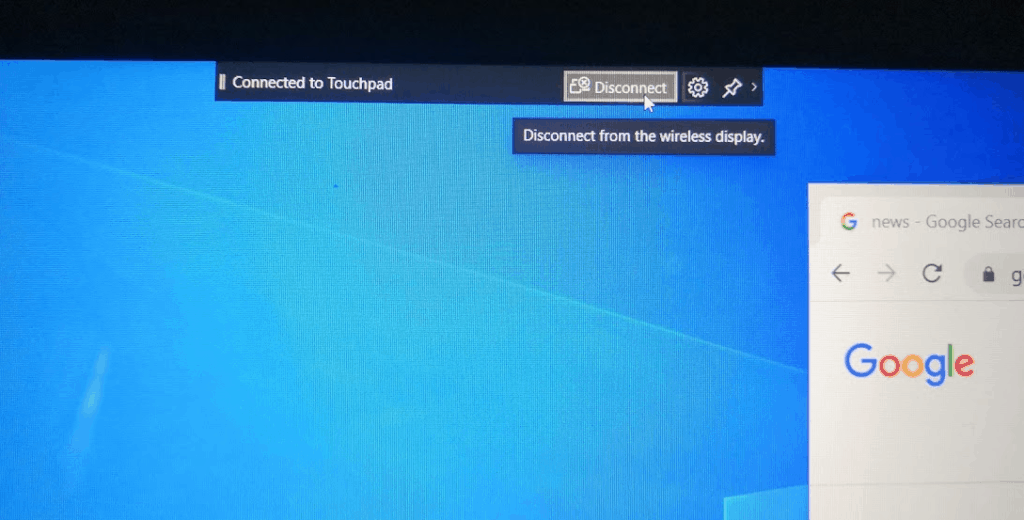
To end the connection and monitor share, just hit disconnect! Hope you enjoyed this article on how to use a laptop or tablet as a second monitor.
Please share if you found this useful, you can check out more tech posts here.