
If you have a Cisco Meraki AP with an expired cloud license, its pretty much useless. However, if you have a RaspberryPi, some wires, and some patience you can pretty easily Flash Cisco Meraki with OpenWRT.
Disclaimer : This voids your warranty and Meraki subscription so best done on decommissioned units that have not been updated in awhile. May not work on new units.
Things You’ll Need
- Cisco Meraki MR33 AP (can be done on other models with serial pins)
- RaspberryPi (any model with GPIO) + Monitor + Keyboard + Mouse
- Three Pin-To-Pin jumper wires (can be salvaged from old IDE cables)
- Ethernet Cable
- Torx Screwdriver and a pry tool
- A Laptop and this Google Drive Link (contains the files we need)
Flash OpenWRT on Cisco Meraki
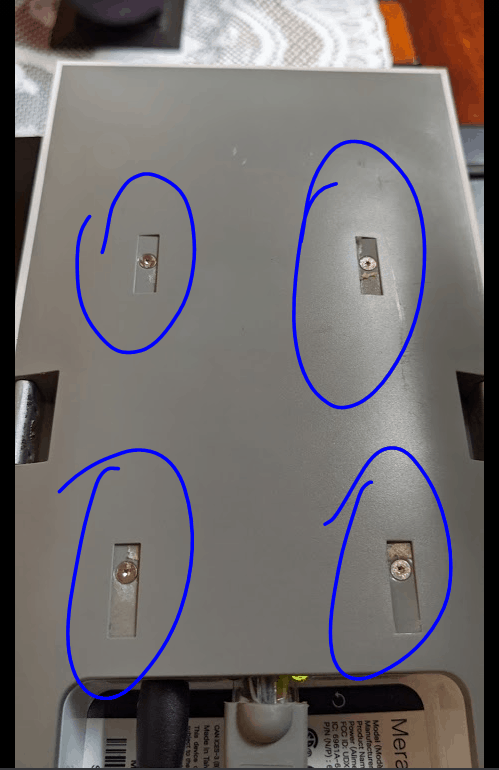
First, remove the 4 screws (behind the rubber stoppers) on the grey underside of the AP, then pry it apart at the seams.
Step 1 : There are 4 screws behind the rubber ‘feet’ on the grey side of the AP. Undo them, then pop the AP apart by using a plastic or metal knife.
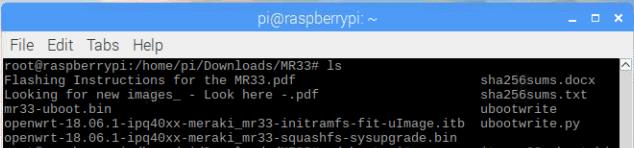
Step 2 : On your RaspberryPi download all of the files in the Google Drive. Extract them with a ZIP tool, then put them in a folder.
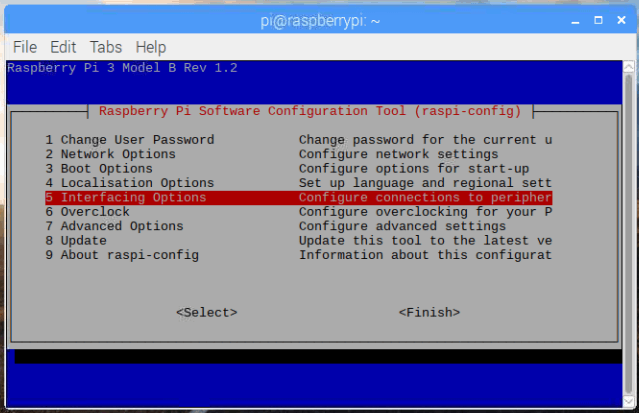
Step 3 : Enable Serial GPIO on the RaspberryPi by typing “raspi-config’ navigating to Interfaces -> Serial -> Prompt 1 Hit NO -> Prompt 2 Hit YES-> You will see a confirmation , hit OK -> Hit Finish (bottom right)
This will enable the Serial on the GPIO pins which run across the side of the raspberrypi , to figure out your serial interface d0 the following command :

Take note that we will use the ttyS0 interface
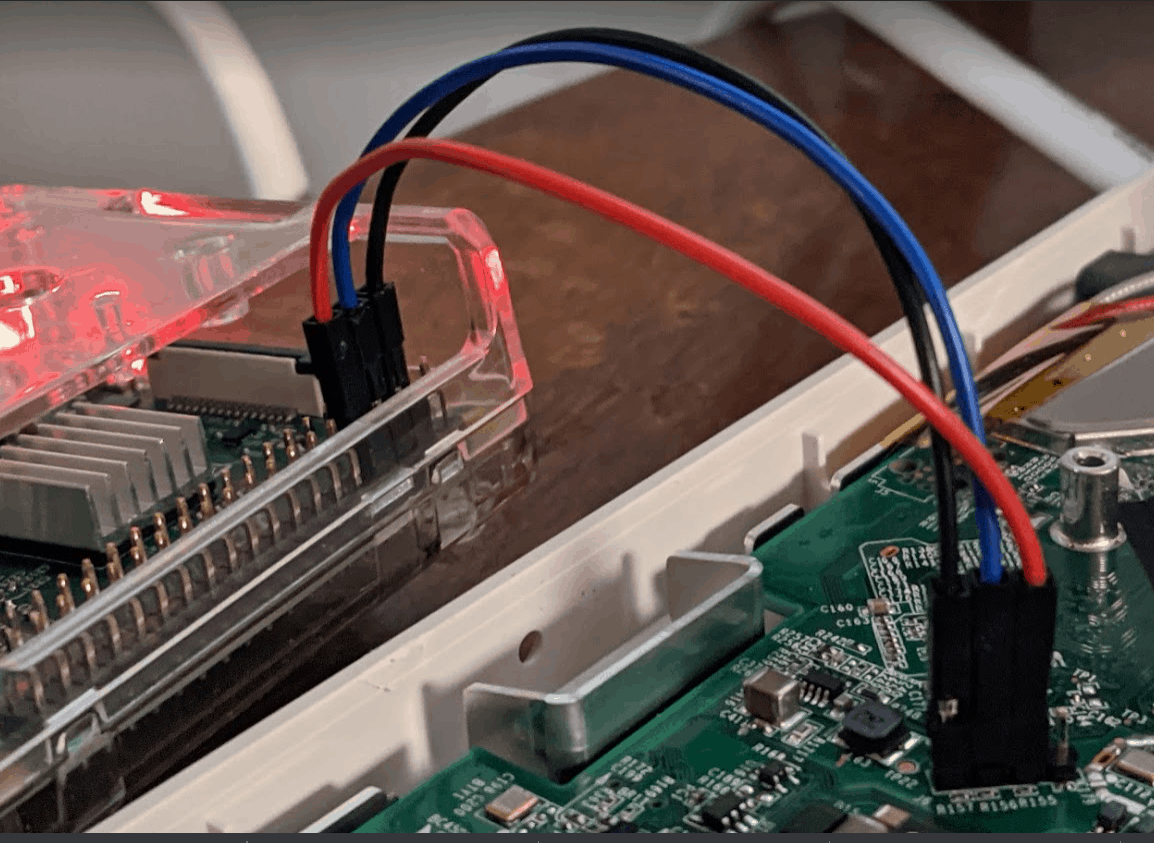
Step 4 : Connect these GPIO serial pins on the RaspberryPi to 3 pins on the Meraki board.
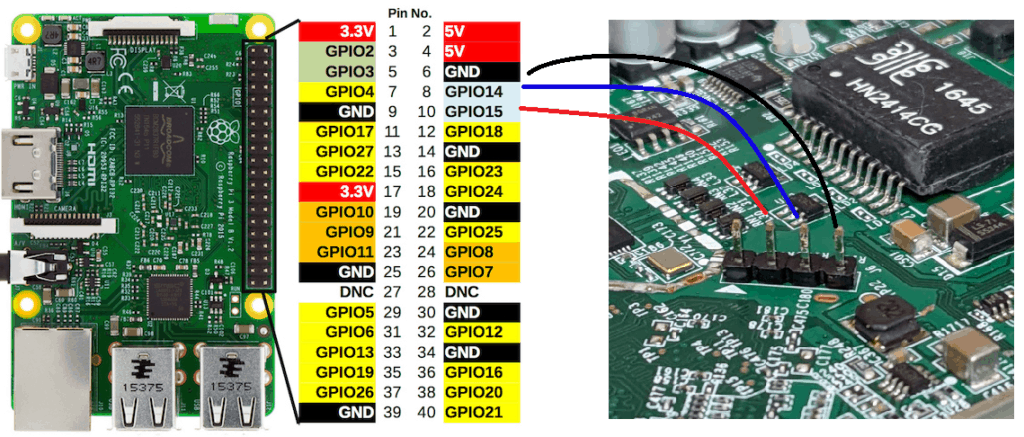
D0 NOT connect anything to the pin with the white arrow on it.

Step 5 : Now Launch the flashing script with the following command , you need to add the name of your serial interface with the –serial={interface path}. After the python script is running and you see “Uploading image” then power on your AP to boot it , be careful not to let the serial wires move or shift.
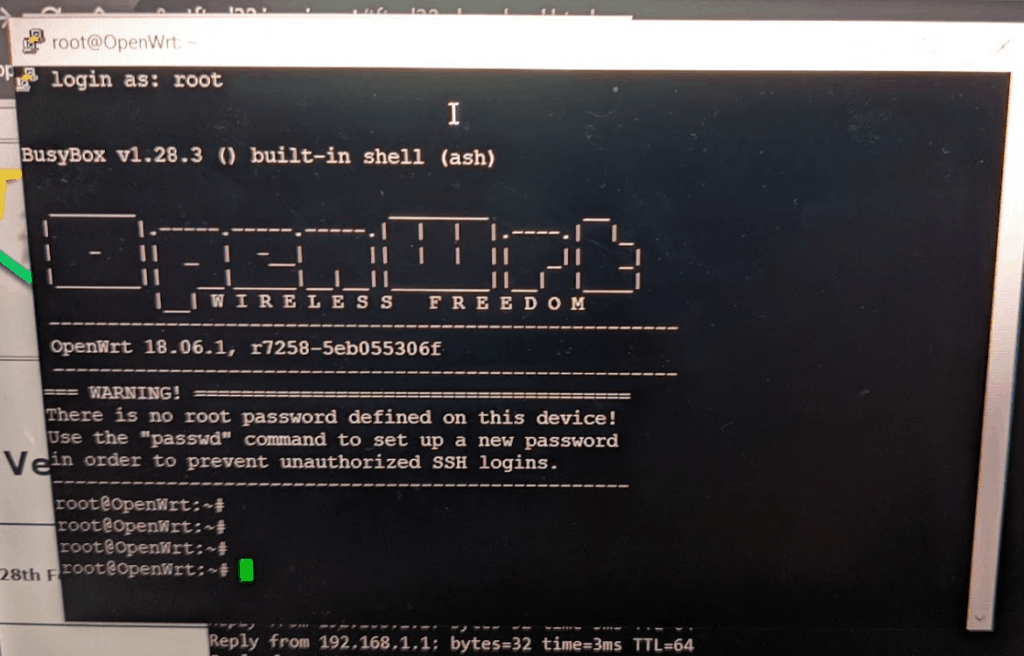
If done correctly you should pretty instantly see the following output after booting the AP :

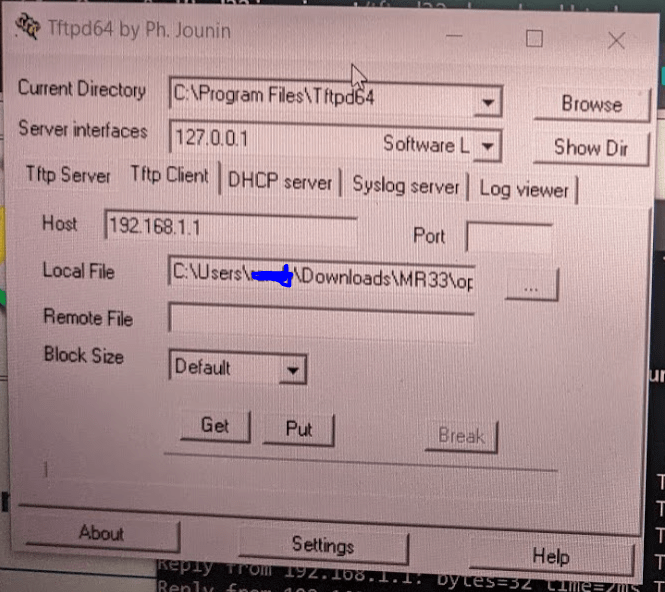
Step 6 : One the upload is done. Connect an Ethernet cord to your AP from a laptop or the Pi , set your interface IP to 192.168.1.2 and your gateway to 192.168.1.1 with a subnet mask of 255.255.255.0 and verify it works by pinging 192.168.1.1 , if you get a response port 21 should also be open.
Now Upload OpenWRT to the AP via TFTPD64 by hitting the PUT button :
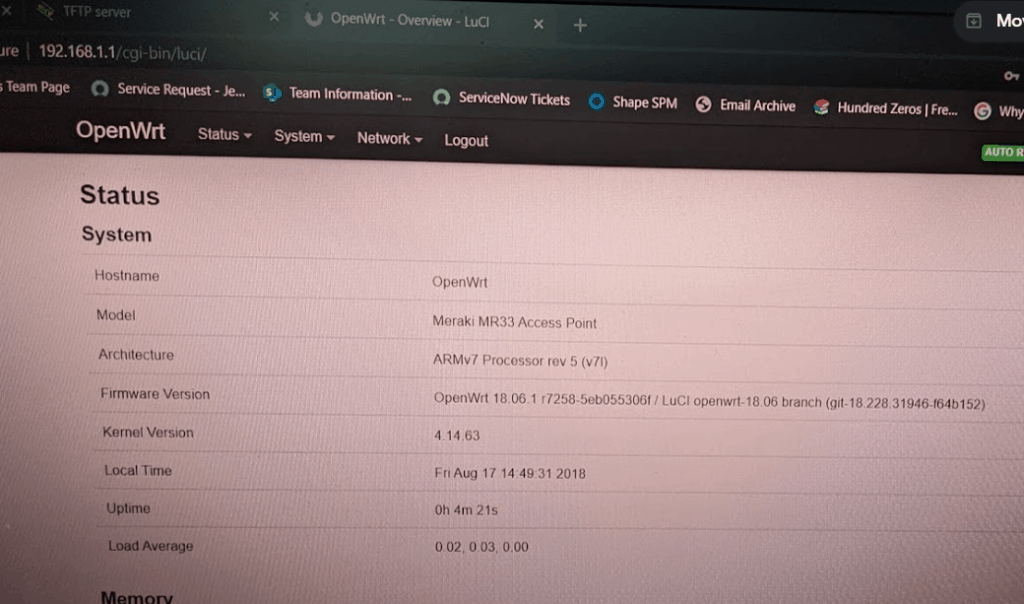
The AP should now Reboot after this is uploaded, wait till pings return, now you can browse to http://192.168.1.1 and see the following or SSH to see OpenWRT!
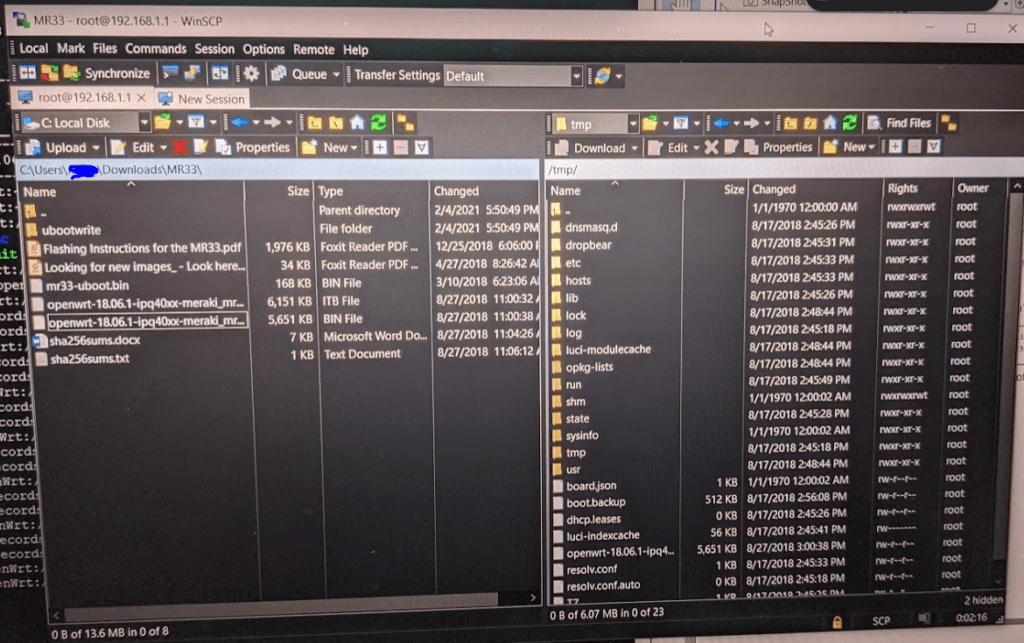
Now use WinSCP to connect to the AP via SSH and transfer the .bin file to the AP
Finally , You can reboot the AP to go back to Meraki or run this command which will install OpenWRT permanently 🙂

This concludes how to flash OpenWRT on Cisco Meraki ! For more Tech articles click here.